How to photograph the northern lights for amazing landscape photography
The Aurora Photography Season starts soon
Even in a weird year like 2020, as summer climaxes and soon slowly comes to an end- in suitable places pretty soon the Aurora borealis aka. the northern lights will be back on the night sky. So in a few weeks you might be abled to put these landscape photography tips to use and capture some amazing astrophotography!
Without digging to deep into geography, we need to be quite far north or south in order to have best chances to capture either the Aurora borealis in the northern hemisphere or the Aurora australis in the south. As you might know, my preferred place to chase the northern lights is the Lofoten islands in northern Norway. The landscape photography shown in this blog are all taken out there. Lofoten islands are my absolute favorite place to capture the northern lights as you might find out in this article.

Chasing the Aurora borealis
is one of the most exciting landscape photography ops
So if you are in for a long night, charge your camera batteries, grab warm clothes and search for a place with unobstructed view towards the north. If you happen to be around the arctic circle, the upcoming arctic autumn is arguably the best time for Aurora watching. Towards the autumn equinox, very often the strongest solar activitiy takes place with several solar storms in a row possible. My own favorite time for Aurora borealis photography is winter, as i just adore the contrast between icy or snow covered foregrounds with the great activity on the night sky.
I wish you good luck with the capricious weather- you are in for a treat!
preparations for a night session
Check the local weather forecast and if possible try to find out about an area with high chance of clear skies. Scan Google Earth and Dark Site Finder for places with the lowest light pollution possible unless you want to shoot man made light sources as an element of your image, which can also look quite nice.
Install an app to monitor the Auroral activity on your smartphone. There are several ones out there nowadays, but with these two i have made good experiences. They are slightly different on both systems, but they do a good job. Aurora forecast for Android and Iphone.
Also make sure to check out Spaceweather.com and the 3 day Aurora forecast.
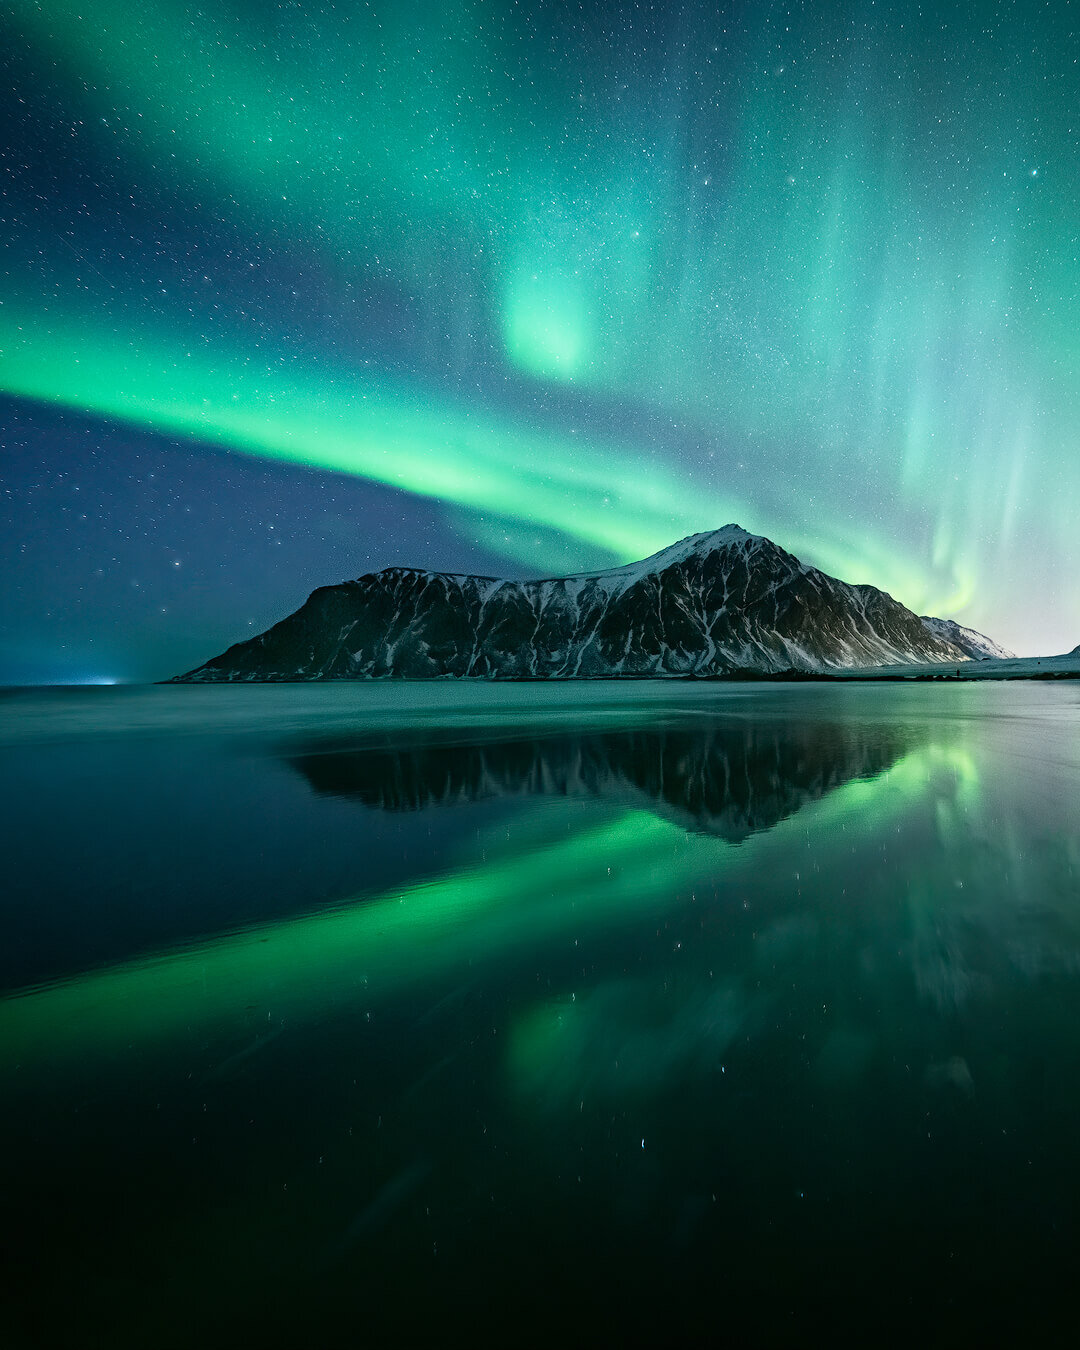
When low tide and the northern lights coincide, magic will happen
Skagsanden beach, Norway (Lofoten islands)
Let´s remember that all these pages use similar information provided by different geophysical research stations around the globe. While the predictions have proven to be quite accurate in the last years, they still don´t mean that you will get to see the northern lights only because the apps tell you. To further assure that your chase will be succesful it will be needed to learn how to read the more sophisticated graphs from the magnetometers that are constantly monitoring every activity on satellites out in space, which can be quite a hieroglyphic thing without advice by scientists or an experienced photography guide (shameless plug: i offer private photography workhops)
Wideangle lense makes sense
Even if i always encourage everyone to focus as much on the composition of an Aurora image as you do with every other image taken during the day, when shooting the northern lights it´s important to be abled to take in as much of the sky as possible. A wideangle lense allows this while still leaving enough room to include a dynamic foreground. Wideangle lenses also offer a bigger depth of field, which comes handy at night as you will see later in this article. Something around 6-20mm on crop sensors should be good while the most popular lenses for full frame cameras have around 11-24mm. Fisheye lenses with huge field of view also find use for this purpose, but as it´s more likely to overdue it with the compositions, they find more use in scientific and documentary photography than for fine art landscapes. There you simply need to capture as much of the sky as possible and often even just point straight up.
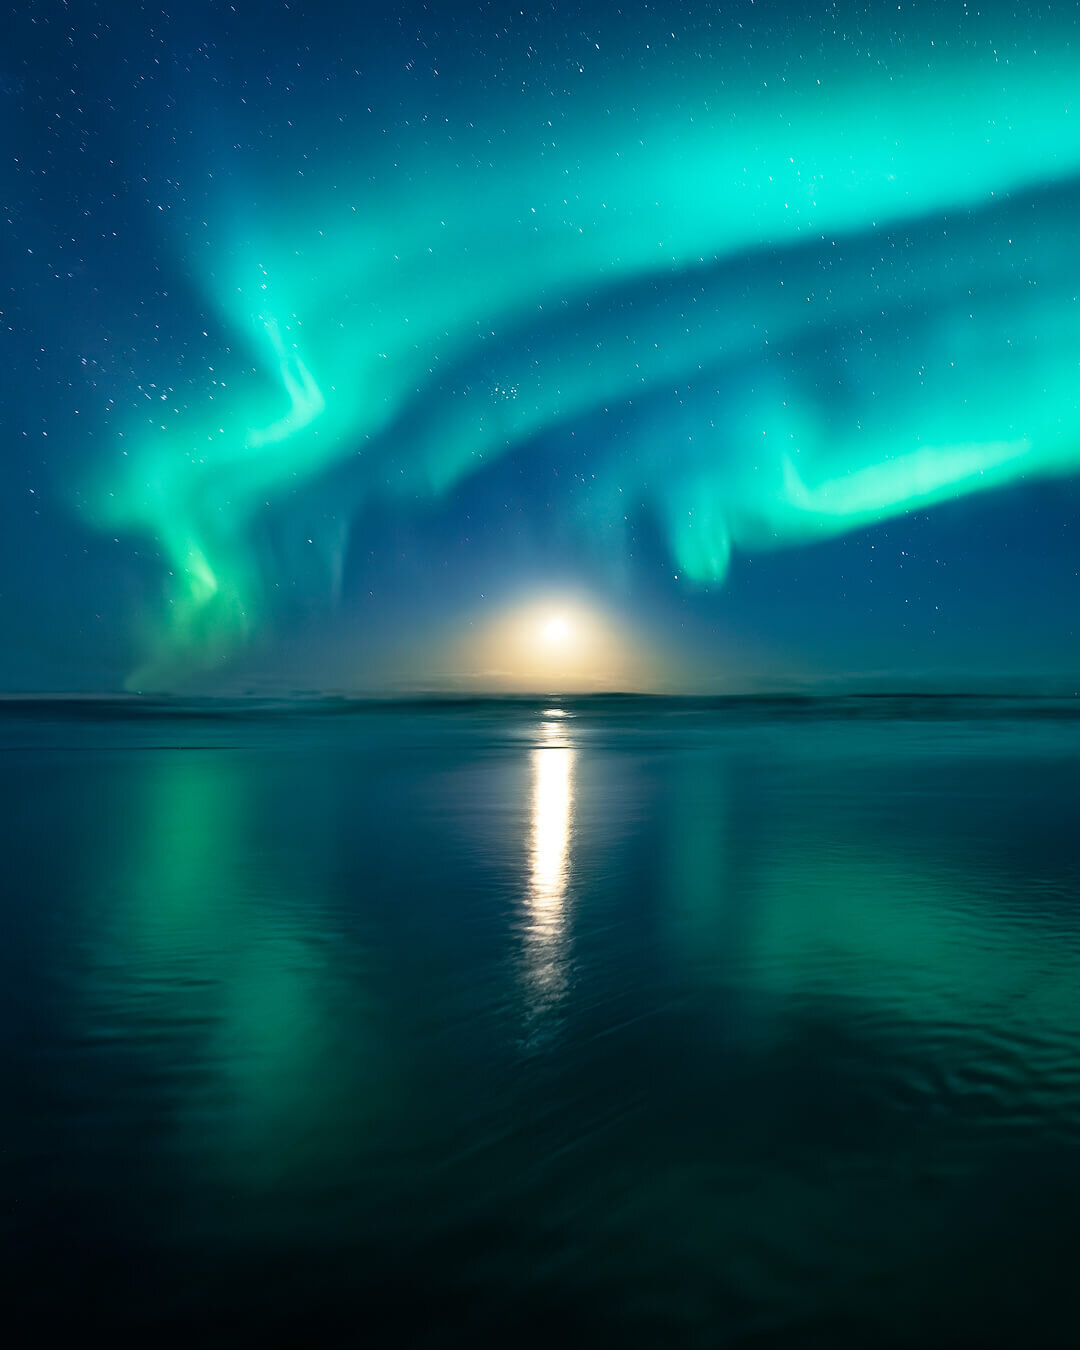
The moon and the Aurora borealis
work well together in some scenarios
Recommended Camera Settings
You will need to crank up the light sensitivity (ISO) of your camera as far up as your camera allows while still retaining a decent image quality. For entry level cameras that will be something around ISO 800- 1500. With professional cameras like the Nikon D850, Sony A7R4, Canon 5D IV, Canon EOS R 5 and many more, you can also go way further up to ISO3600-8000 and still get a printable result. Then there are also the ISO monster like the Sony Alpha A7S III. These fantastic little night vision devices allow you to go up to ISO 45000 and still retain a nice workable file at a lower resolution.
Open the aperture (f-stop) of your lens as much as you can to let as much light as possible hit the sensor. After all we are talking about night photography, which of course includes shooting in total darkness depending on the moon. Entry level l enses will most like stop at f 4 or f 5.6. This doesn´t mean that it´s impossible to shoot night images with them, but you won´t have much playground compared to more sophisticated lenses. Even a small jump in the aperture will mean significantly less light hitting the sensor of your camera. You´ll most likely be forced to shoot at the higher end of your ISO range and still need to do long exposures of around 30". Most professional lenses will offer at least f2.8. A very popular lens for aurora photography which i almost exclusively use for this purpose is the NIkkor 14-24 2.8.
Even Canon and Sony users often use this Nikon lens on their cameras, as it has had the fame to be the sharpest zoom lens with the best values for coma and corner sharpness. There are also many prime wide angle lenses that offer wider apertures, but many of them face different issues when used wide open. If this interests you, check out Petapixel about how to read MTF charts. I personally don´t give much about all these charts and controlled test examinations. Instead, i´ll always just search for real life user feedback and then rent a lens in order to test it out there in the field- that´s the only thing that matters to me in the end.
The exposure you should go for is depending on the intensity of the Aurora and especially the speed of the movement. The faster it dances- the shorter we have to expose to retain the gorgeus textures preventing rendering the result to nothing more than a colorful blop in the sky.
If the lights are faint and only slowly moving, start with f2.8, ISO1000, 20-30"
When they pick up pace adjust to f2.8, ISO2000, 10-20"
Now the lights go totally crazy like they are likely to do in the next days you will need to play with the settings to stay under 10" exposure for the best results.
Something i have frequently used: f2.8, ISO3600, 2-8"
All this is dependant on your camera gear and most importantly light sources like the moon and also the light pollution of street lamps, cities and even boats on the sea. While searching for tips to shoot the Aurora borealis one will often find people saying that the days around new moon are the best. I disagree with this and prefer to shoot with increasing or decreasing moon- but not at full moon. The landscape will be extremely dark around full moon while it get´s lid up beautyfully when the moonlight shines to gently play with the surrounding landscapes. This effect adds so much to a landscape photograph... in the end the best you can do is extending your trip as much as possible to make sure to get multiple chances to shoot the northern lights- this way you can also learn how much moonlight adds to your scenery and how much it can cause trouble when it´s missing.
How to nail focus in the dark
During the night we will be opening the aperture to collect as much light as possible, which also leads to a shallow depth of field. For most purposes of Aurora photography we will want to have as much of our scene tack sharp as possible. We can achieve this by avoiding to have elements too close to the lens.
The easiest way of focussing in the darkness of the night is searching for a bright light source that is far away from you- some cameras are capable of doing this in liveview using a bright star, for most we´ll have to drop a lamp around 50m from us and then focus on it. Sometimes we can also use the car lights of some other photographers which might be somewhere around or street lamps, houses (which we normally try to avoid- some of the best locations still feature a few of them unfortunately). This will lead to an image that is sharp enough overall and with some sharpening applied in postprocessing it´s totally useable.
Now shooting with wideangle lenses really invites to play with prominent foregrounds- this can result in quite a pain. But luckily there is the great technique of focus stacking. For this you shoot different images at the same settings while adjusting only the focus throughout the scene. I do it manually without even watching it anymore nowadays, but using liveview and a torch to light up the area of interest is also a good technique. This can be very disturbing for other photographers though- so be always conscient about this and don´t overdo it.

Composition is very important
to create Aurora images that look exciting
Tips that keep your session fun
Keep your batteries warm. When shooting in cold conditions the batteries will drain much quicker than normal. This is why i stopped using a battery grip- i can save weight and size of the camera and always keep the batteries warm in a pocket close to my body.
Bring some coffee or tea and munchies. A hot beverage can really be nice when the waiting takes longer than you might have wished for. Some chocolate also comes handy to keep the motivation up.
I think it´s obvious that you will most likely need a tripod for this discipline of photography, but i often see people arriving with big plans without bringing one. If you dont have one, try to put the camera on your cars roof, some rock or your photography bag. McGyver trick number one is getting a bag of rice in a grocery store and placing the camera on it...

The moon is your friend
It will light up your foregrounds and good Aurora will still be visible
I hope this article has been helpful for you, feel free to share it for your friends to see and most important: have a blast shooting the northern lights- they are a mesmerizing motive!
how to make the most of your winter shooting on Lofoten islands !
Find more of my landscape photography on Instagram Youtube Facebook